YouTube is the second-most popular platform across the globe after its parent company ‘Google.’ With such numerous views and accounts on YouTube, this is not the channel on which a business could afford to miss out. The question is, how to create a YouTube channel and grow your brand on this competitive platform? Learn the benefits of video advertising. This post will walk you through the essential steps to building a YouTube account for your company. Let’s get started.
Create a YouTube Channel in 10 Easy Steps
Step 1: Begin the Process With a Google Account
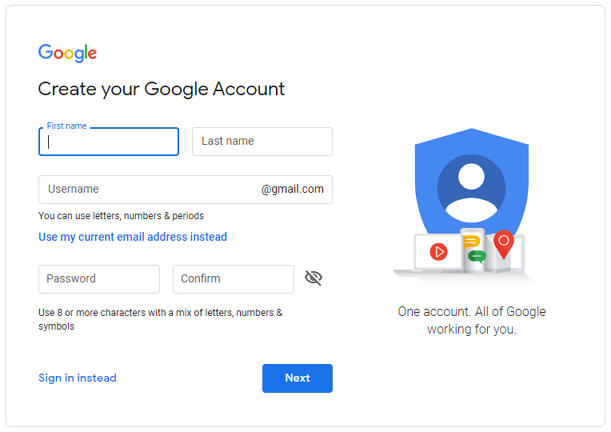
If you use Gmail, Google Play Store, or other Google-based platforms, you don’t need another Google account. Even if you don’t like the name or email address you used to create the Google account, you can keep it the same, as it won’t be displayed to your YouTube audience. You require a Google account to create a YouTube channel. If you already have one, skip this step. If not, create a Google account following the below-listed steps:
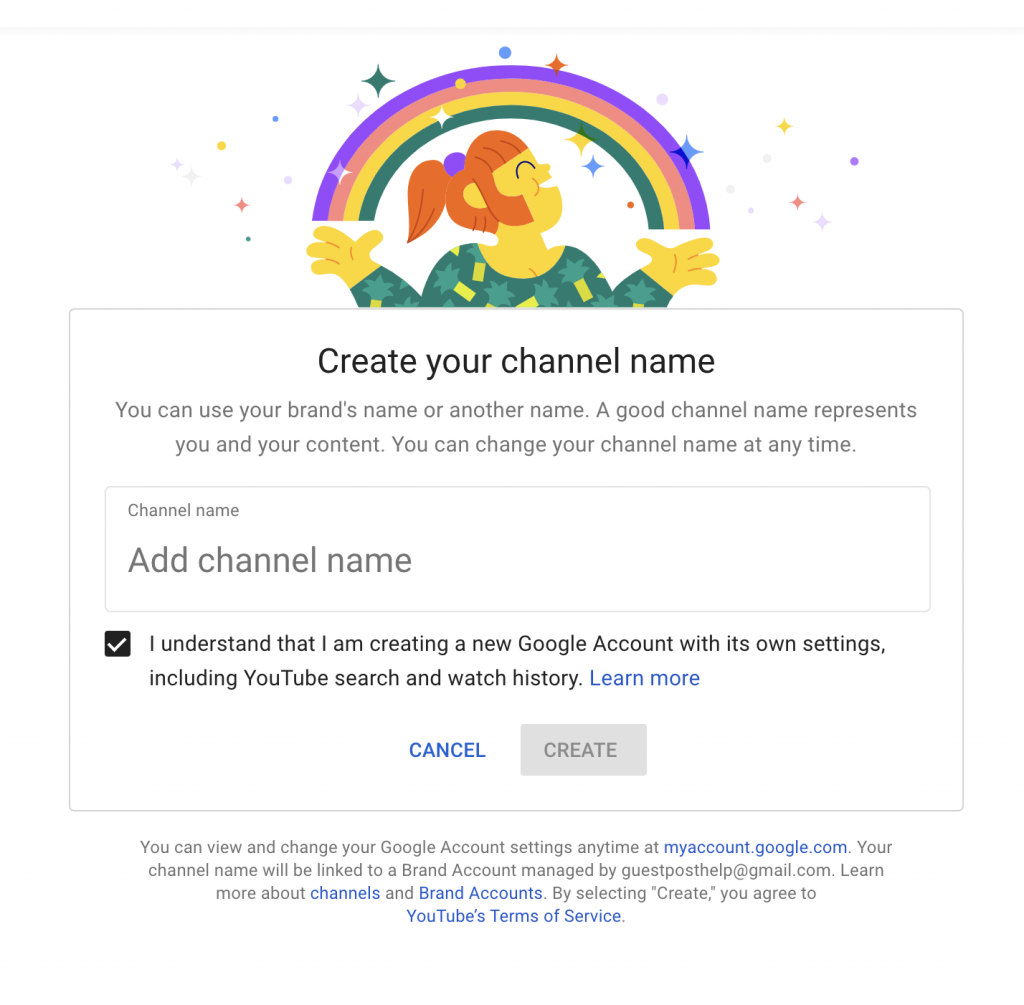
Step 2: Create Your YouTube’s Brand Account
Once you sign up with Google, you get a YouTube account. But that’s a personal YouTube account that you can use to watch videos. Only you will be able to handle your personal YouTube account. Another drawback is that personal accounts display your Google name, and you can’t customize it. You need to create a brand account on this platform to market your brand through your channel. By creating a brand account, your company or marketing team will access your channel. Follow these steps to create a brand YouTube account:
That’s it! Now, you’ll have your brand account and personal account. You can collect regular insights and data concerning your target audience.
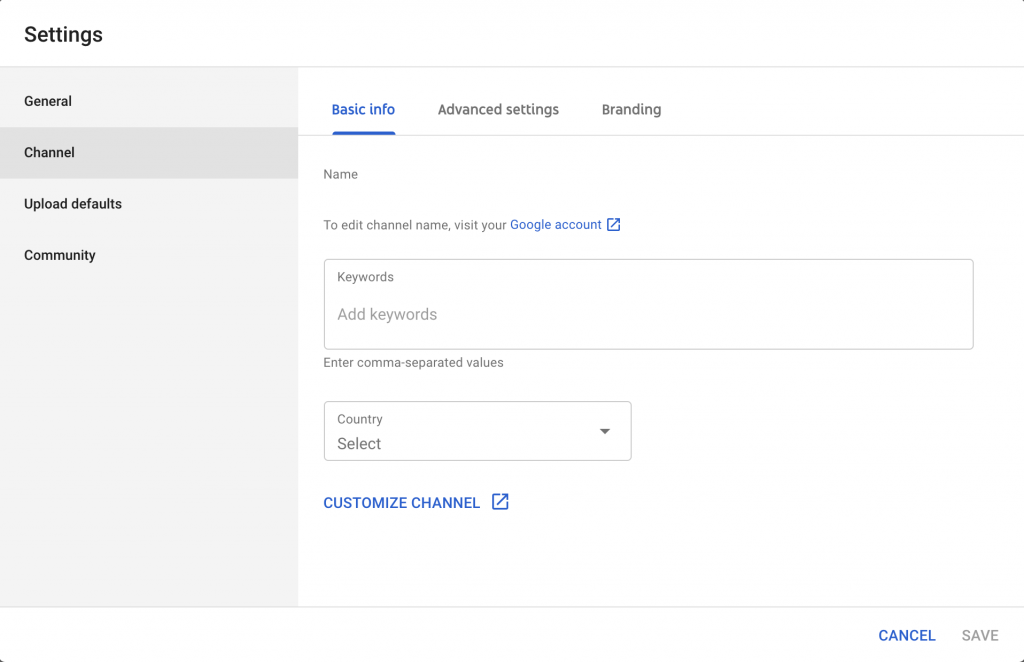
Step 3: Add Brand Identity
When you create a social media account, your main purpose is to develop a powerful brand identity that could catch your audience’s attention and drive maximum traffic to your website. That’s what you need to do on the YouTube channel. So let’s see how you can add a channel network.
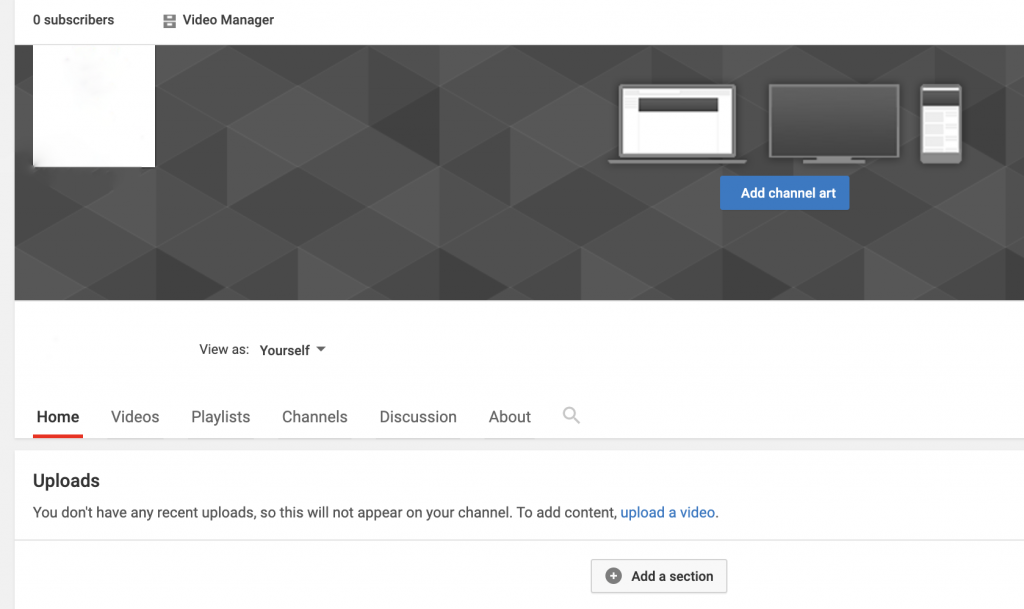
Open your YouTube channel on a desktop, as that’s the only device that allows users to change the YouTube profile images and other information. Hit the “Upload Picture” option and upload a brand logo.
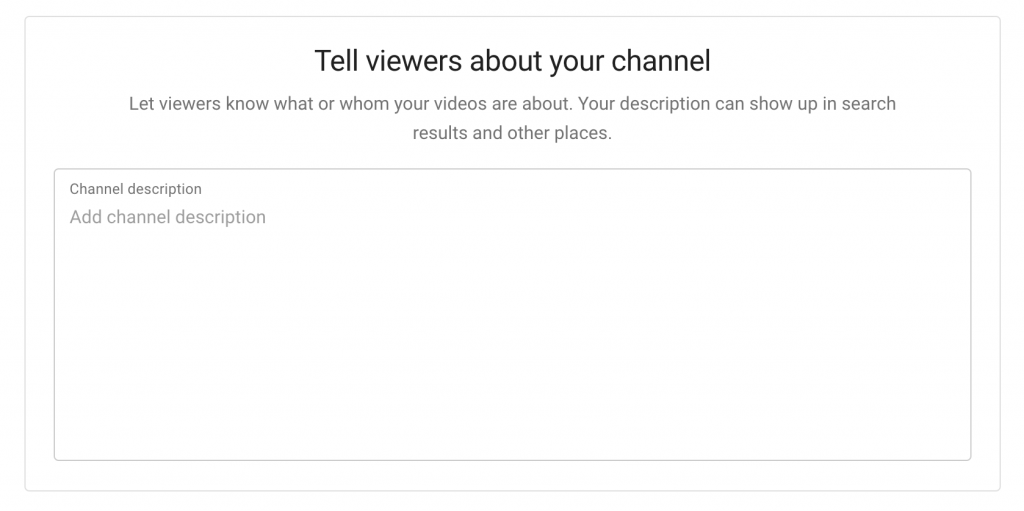
Add channel description.
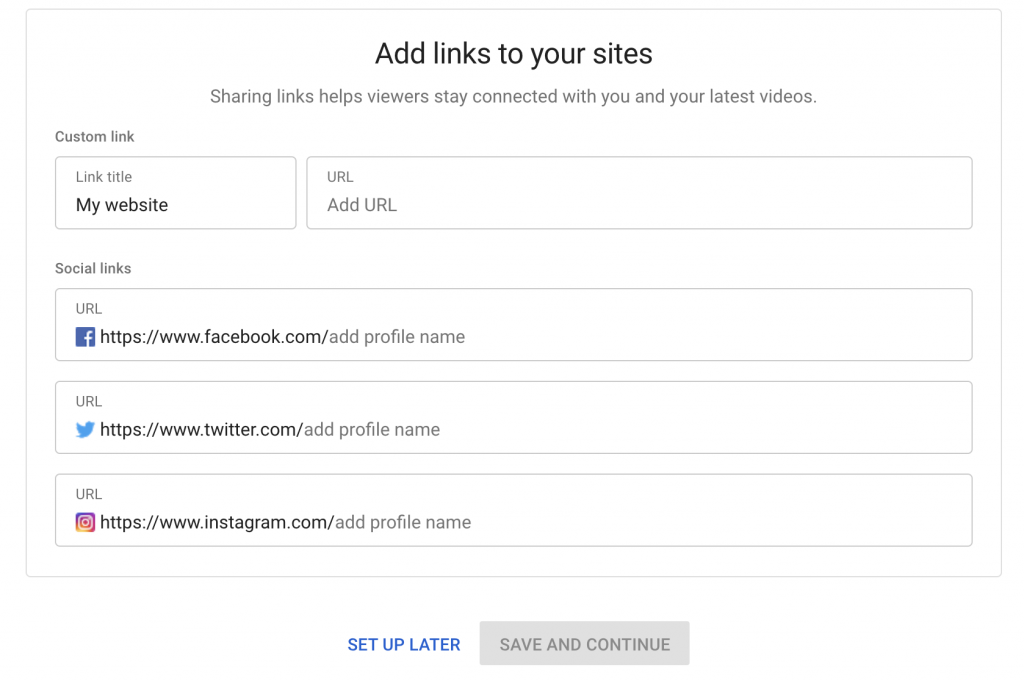
Add a custom link (It’s your website link) and social links to your brand.
You can skip these steps by clicking SET UP LATER, otherwise fill in the details, and click on the SAVE AND CONTINUE button. Next, click the CUSTOMIZE CHANNEL button. On the next page, click on the “add channel art” button. You must upload a channel art that users can view from all devices.
Learn this guide by YouTube to create a channel art itself.
Step 4: Upload a Video
Now that your YouTube account is set up, follow these steps to upload your first video to YouTube.
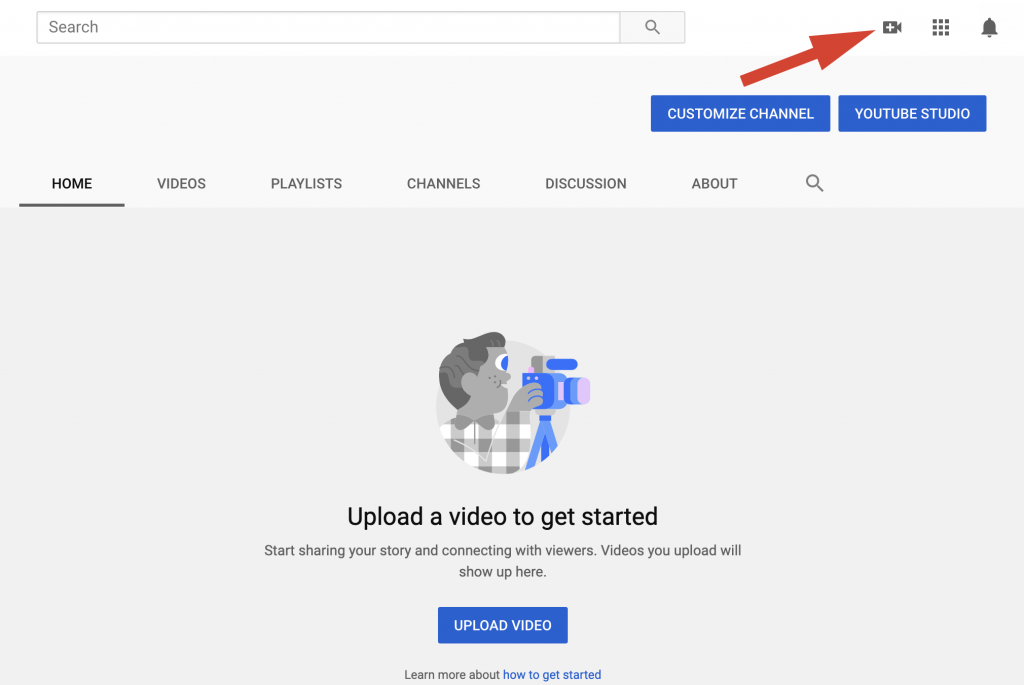
Click on the small video camera-like option in the top right corner.
You can upload a video from your laptop/PC.
On the Detail page, add an eye-catching and keyword-filled title and description. Don’t stuff keywords as it can hurt your video ranking—complete other details as per your requirement.
The excellent length of the title is up to 100 characters, and a perfect description is around 5000 characters. Stick to the word limit and perform keyword research before uploading the video. When you upload a video, YouTube will automatically generate a thumbnail for your video. Here, you can also find the option to upload a custom thumbnail that will help you to attract more people to your videos. In case if you don’t have time to create a custom thumbnail, you can use tools like YouTube Thumbnail Downloader to grab other video thumbnails.
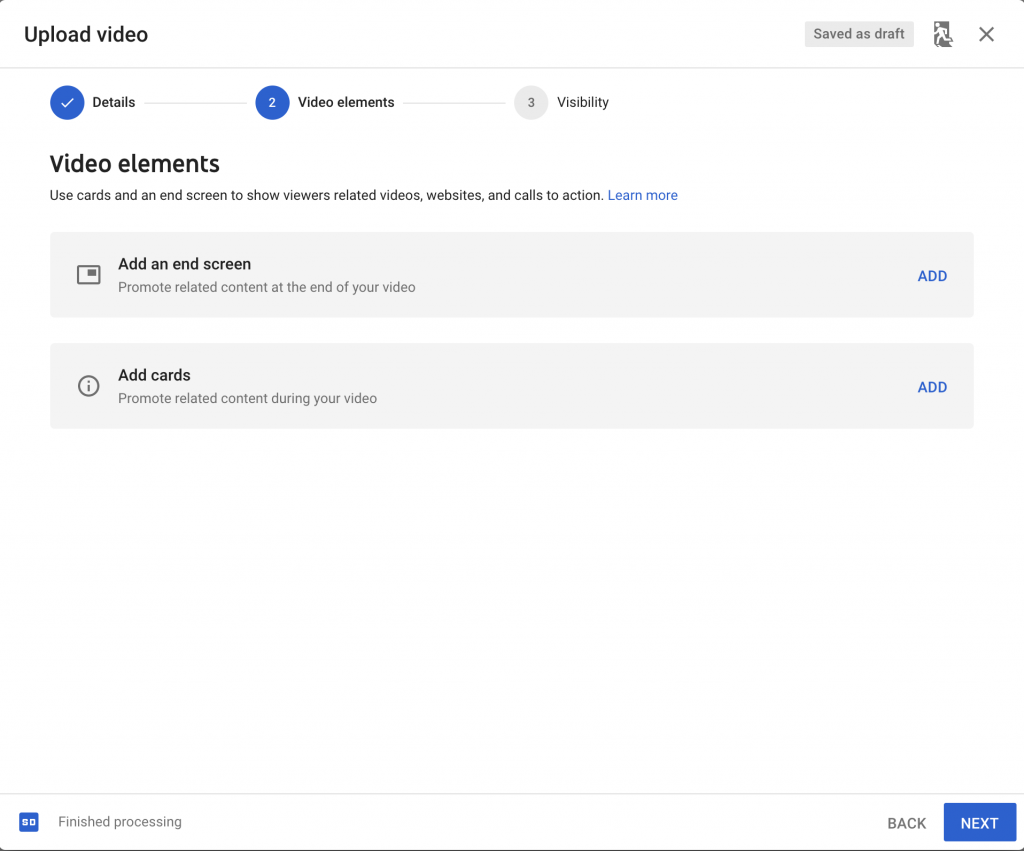
Click the Next button and move to the Video elements page. Here you can add an end screen to promote related video at the end of your video. You can also add cards to promote related content during your video.
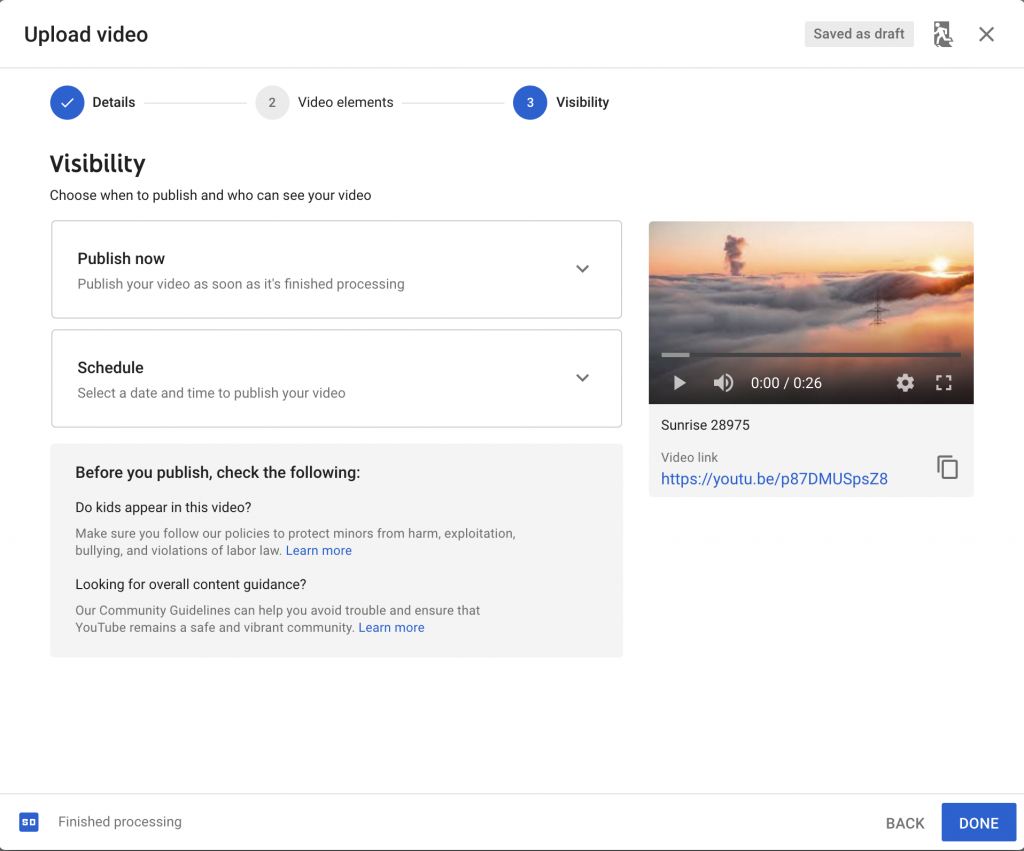
You can choose when to publish and who can see your video on the visibility page.
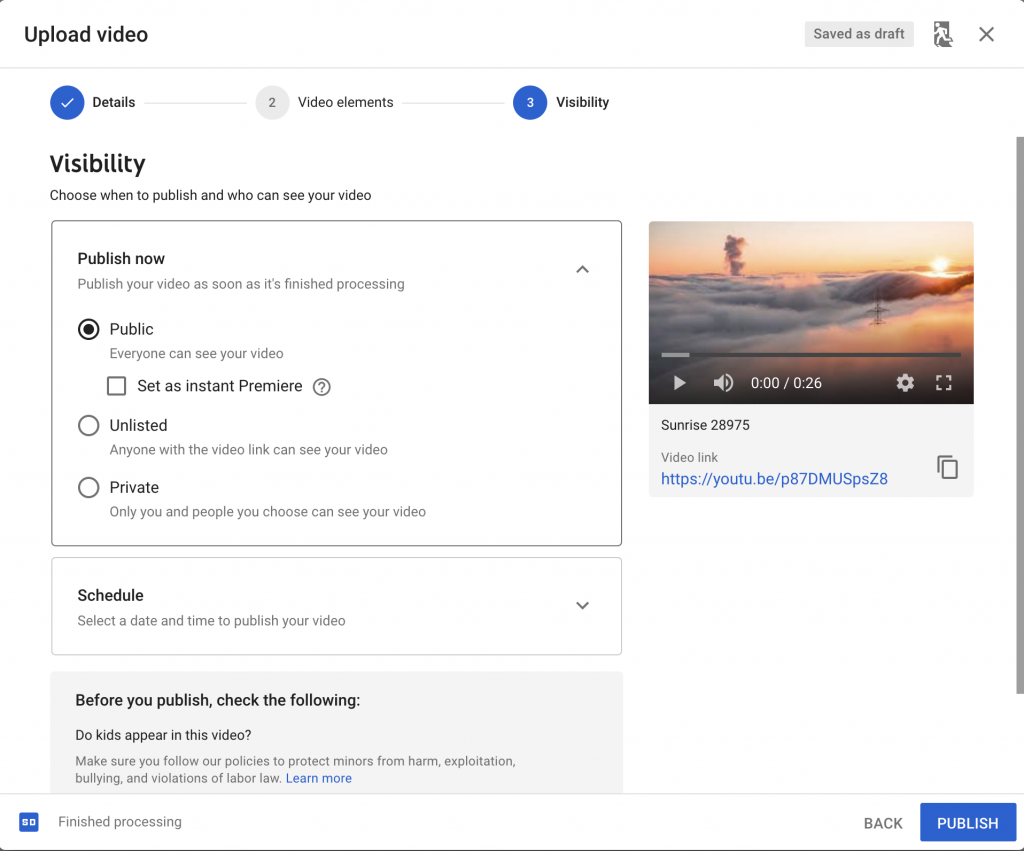
You can publish your video using the Publish now option. Not only that, but you can make your video public, unlisted or private.
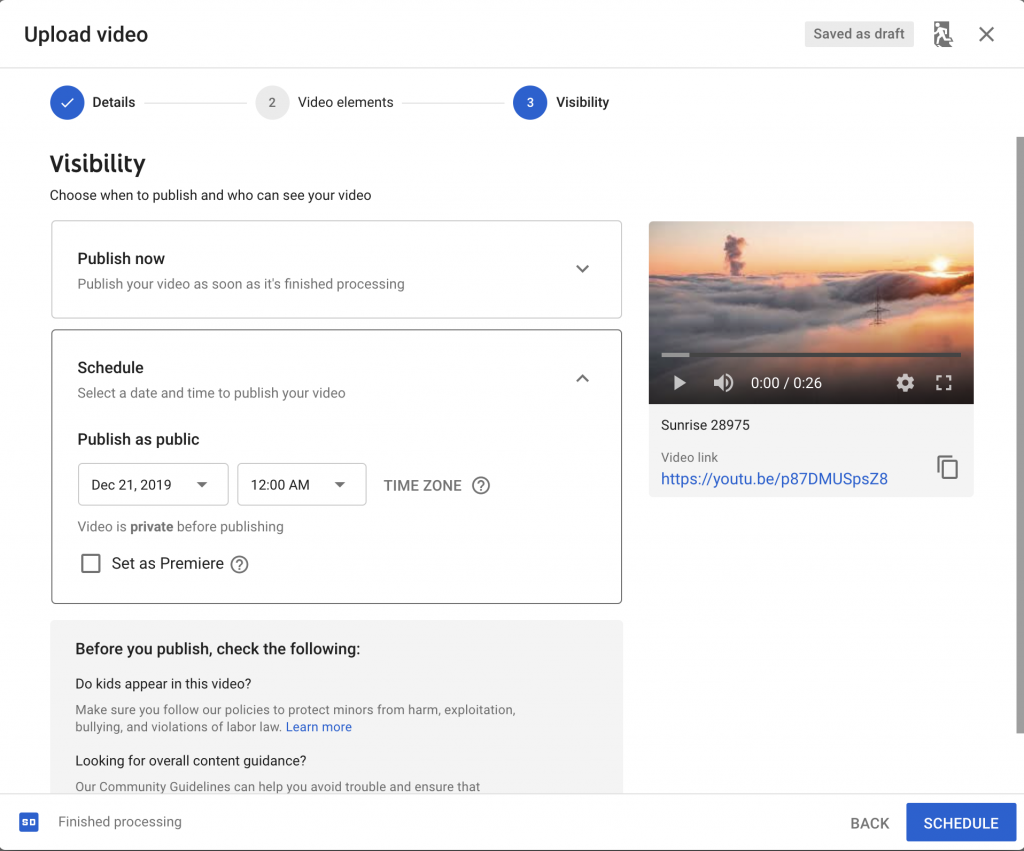
Using the Schedule option, you can schedule your video to publish at a specific time.
Hit the Publish or Schedule button.
Step 5: Organize Your YouTube Channel
Once you have uploaded the first video, it is time to create a YouTube channel structure. To promote your brand on YouTube, you must make the YouTube navigation process easier for your customers. The easier the navigation around your YouTube channel is, the more traffic your videos will receive. To make the navigation process easier, divide your YouTube content into categories. Depending on your requirements, you can modify the YouTube channel structure later. But, you must set up a basic framework initially. Here’s how you can structure your YouTube content into playlists. Your YouTube Playlist should convey some meaning and engage users to keep watching your video.
Step 6: Create the Trailer
A trailer is a short video that defines you and describes your brand. You can create a trailer video where you are seen introducing yourself and the brand. You can also request the audience to watch your video, like it, comment, and subscribe to your channel. Trailer is essential as it gives a more professional look to your video and makes it more appealing to your visitors. To create a trailer:
Step 7: Improve your Channel’s Ranking
Once you have set up your YouTube account and uploaded the first video, it is time to take the next crucial step and get people to visit your channel and discover your brand. Here’s how you can make it easier for the audience to find your channel on YouTube.
Insert Industry-specific Keywords
Allow Channel Recommendations
Add Channel Description
Here is our complete guide on YouTube SEO Tips.
Step 8: Add your Team
As you have created a brand account on YouTube, you can add as many team members as you want. The following steps will help you add team members to your YouTube channel.
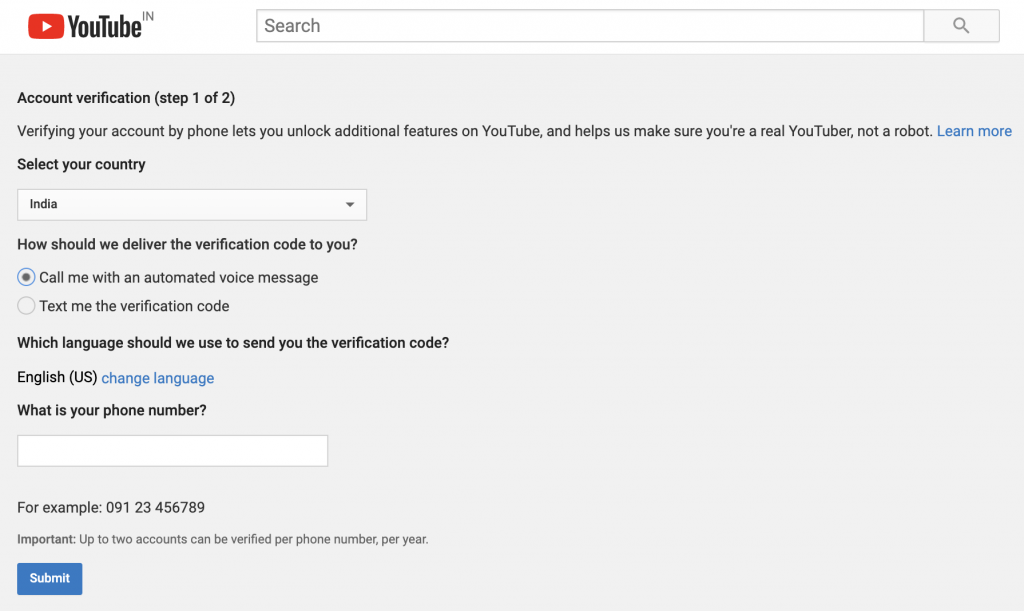
Step 9: Verify Your Brand Account
To create custom thumbnails and earn access to longer than 15-minute posts, you will have to verify your YouTube Channel.
Once your verification request is approved, you can post longer than 15-minute videos and access other advanced features.
Step 10: Join the YouTube Partner Program
Have you received 1000 subscribers? Do you have more than 4000 hours of watch time? If yes, you are eligible to join YouTube’s partner program. This program will allow you to access more exciting features such as YouTube monetization. Learn more about how to gain YouTube subscribers and watch time. Whether you have commenced your business or planning to expand your established company, YouTube is the best channel to take your business online. Follow the above-listed steps to create a YouTube channel and grow your company online.

![]()